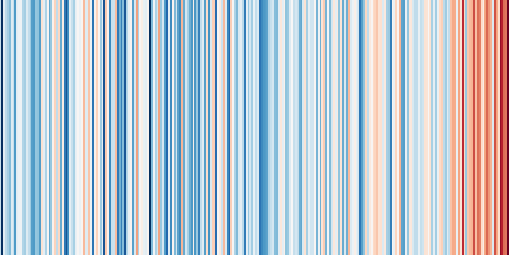
Show your own stripes
2019-06-20 22:35
You want to create #ShowYourStripes for the location you live in? Here's how.
Intro
When I first saw #ShowYourStripes I immediately felt in love (thanks Stefan Münz for tweeting about it). I think it's a great and simple visualization by Ed Hawkins of what we are currently facing when it comes to climate change. You don't need to scroll through long tables or figure out the axis on some diagram. You can simply see that there's something massively changing.
After playing around a bit with the cities available on the #ShowYourStripes website I wanted to do the same for the city I live in, Augsburg, Germany. I looked at the website's source code first, in hope that it dynamically creates the data from some JSON or so. That isn't the case. I then searched Twitter, GitHub and the Web if I can find any related open source project. I wouldn't want to spend time figuring out the parameters that were used to create those. After all, I wanted mine to look exactly like those.
Luckily I found a Tweet from Zeke Hausfather saying that he could create those. I then asked him if he could please release the source code. And just 7h later he did.
Creating your own stripes
Now it's time for a quick tutorial on how you can create your own #ShowYourStripes with that source code.
Prerequisites
I did those steps on a Debian system that had the most common tools installed (like Python3, or Wget). I'm using Pipenv for installing the required Python packages, but you can use any other package management tool for Python.
Let's get the data file with the global temperature values first. It's 200MB so it might take a while.
wget http://berkeleyearth.lbl.gov/auto/Global/Gridded/Complete_TAVG_LatLong1.nc
Now retrieve the source code:
$ wget https://raw.githubusercontent.com/hausfath/scrape_global_temps/master/City%20Warming%20Strips%20.ipynb -O showyourstripes.ipynb
In order to run the script, we need to get a few Python packages first:
$ pipenv install matplotlib nbconvert netcdf4 numpy_indexed pandas
Running the script
The original script is a Jupyter Notebook, so we convert it to a plain Python script (you can ignore the warnings):
$ pipenv run jupyter-nbconvert --to python showyourstripes.ipynb
Next we need to make some changes to the showyourstripes.py file so that it works on your machine and plots the stripes for your location. We work on the current directory, so you can comment out changing the directory:
#os.chdir('/Users/hausfath/Desktop/Climate Science/GHCN Monthly/')
The other changes we need is the location the stripes should be plotted from. Here I use the values for Augsburg, Germany. Use your own values there. When I don't know the coordinates of my location, I usually check Wikipedia. In the top right corner of an article you can find the coordinate of a place (if it has one attached). If you click on those you get to the GeoHack page of the article. There on the top right you can find the coordinate in decimals in lat/lon order. In my case it's "48.366667, 10.9".
savename = 'augsburg'

lat = 48.366667
lon = 10.9
Now you're ready to run the script:
pipenv run python showyourstripes.py
Now you should have an output file called augsburg.png in the same directory which contains the stripes.
Conclusion
Have fun creating your own #ShowYourStripes. Thanks again Zeke Hausfather for making and publishing the source code so quickly.
Categories: en, climatechange, tutorial
